Wednesday, August 31, 2011

Installing Wood Laminate Floors

Including Demo & Choosing a Paint Color
Creating our Nursery- Part 2 of a 3 part series

Have you ever tried to find the perfect blue? Not too childish, not Crayola, subtle enough with enough gray to be "tasteful"? If you read my How to Paint a Front Door blog, you know that there are hundreds of blues to choose from. It's crazy! I'm convinced that blue and green and white are the absolute hardest colors to pick. My strategy was to pick 3 dark and 3 light that stood out to me, slap them up on the wall, stare really hard, point and choose. Or something like that.
We ended up choosing a dark blue (the name of which has escaped me) that Mike refers to as Grover Blue (you know, from Sesame Street). The light blue was the one that had the most gray in it to me.
After we settled on the colors, we removed the base boards. This was intimidating to me because I'd never done it before, but actually super easy. My Momma (Queen DIY) clued me in and told me to break the caulk seal between the wall and board with a utility blade. Duh! Once that was done, we used a 5-in-1 tool to gently pry the boards off. We saved them to use as templates for cutting the new base boards.
Our cat thoroughly enjoyed running around the empty room and "stalking" the carpet.
King of the Carpet- so proud of our first demo project we did together! We actually were able to salvage the carpet and handed it off to my Aunt for use in her home. Talk about recycle!

FYI- I was about 5 months pregnant when we put these floors in. The DR had given me strict instructions to not lift anything/ work hard/ do anything fun, etc. So... enter Queen DIY (Momma) and my [other] Aunt to help Mike install the flooring. Both had done this before and are more knowledgeable than Mike and I are. They got started, making sure to stagger the planks, cut them into different lengths, so on and so forth.


The floor is "floating" so no glue or nails involved (read: easy). We bought the floors at Floor & Decor, a lumber liquidator type place. If I remember, the flooring was around $400 for the entire room, which is maybe 13X11 or so. We bought the top of the line mat/liner stuff (green stuff under floor) to go on top of our existing concrete. The flooring dude said to make sure you get the best padding for under your floor (same goes for carpet installation) to get the longest life from your flooring.

This was Mike's first time using a pneumatic nail/brad gun. Super fun! I'm pretty sure you can rent this set-up from your local Home Depot, but we borrowed it from the same Aunt that helped with the installation.

It took some figuring out to get it working exactly right.
Once we got it right, the base boards went in lickity-split!
Flooring: Check
Base boards: Check
White caulk bead around base boards and wall: Check
So proud of their accomplishment! A little exhausted, too.
Oh ya, a little blood loss happened along the way. Although, Mike was oddly proud of each and every scrape, paper cut, and paint stain. The joys of home ownership!

The painting of the room, including the inside of the closet, took about 2 days. The flooring and base boards took 1 day to install start to finish. Truthfully, it seemed like an impossible project when I, in my limited experience, started planning, but it was surprisingly quick and easy! (says the girl who didn't lift a finger due to child-carrying status)

I'm sure every DIY/ home owner can remember their first major project. This one will always be near and dear to my heart for 2 reasons:
1) our first project as a family and married couple
2) it was in preparation for a very special new member of the family

What project have you done that you will never forget? Why?

Thanks for visiting! Please leave me a comment if you like what you've seen! I heart comments!
~Ann Marie


Tuesday, August 23, 2011

Baby Knee Protector

Oh, those sliders are so harsh on crawling babies' knees! We have this slider between our dining room and the previous owners addition, which is now our playroom (can you tell the playroom gets used often?!). Poor little Mickey whimpered every time he wanted to go to his playroom!

My fabulous Mother came over one evening and said, "Hey, I bet your [very handy] husband could whip up something with the router and scrap wood to make that smoother." She was right! I mentioned it to Mike, and in a couple hours we had this custom knee protector!
He routed grooves exactly where the track is so that the piece fits perfectly snug.
He even thought to route the edge with a roundover bit to give it a softer lip. Genius!
It fits perfectly and Mickey crawls back and forth right over that thing! I intend on paiting it the same color as the walls so it blends. And when we want to close the door to that room, simply lift up the board and tuck it away! No joke, my husband is the bomb-diggity.

Have you created anything out of necessity like this? Any other baby knee protector ideas out there?

Thanks for visiting! Please leave me a comment if you like what you've seen! I heart comments!
~Ann Marie

Pot Rack Made From an Old Window ~ Today's Favorite Pin


I think this is just fabulous! Perfect for above our sink between the cabinets. I love Pinterest!

Thursday, August 18, 2011

Creating Our Nursery

Part One of a Three Part Series

One of my favorite projects we've done to our home has been the redesign of Mickey's bedroom. The previous owners had it as their son, Thomas' room, and the set up seemed to work well.


Then, when we moved in, we had no idea we were pregnant so I started to plan for it to be a guest bedroom. I was going to go with a cream/black/tan color scheme. For awhile though, it just stayed a storage room for everything while we were settling in. Later, after we found out we were pregnant and having a boy, I decided it was time to tackle the beast. We cleaned everything out, and boy was it jam packed.
It took quite a bit of time to clean all the junk out of the room, vaccuum the carpets, and clean the windows, walls etc. Then I took measurements and began planning how I wanted things to look. I had to stay on a budget, so construction was out of the question, but I definitely wanted to update the flooring. My husband, Mom, Aunt, and I worked to demo the existing flooring and install new wood laminate. Details on the installation and painting process in Part Two of this series (Hint: blood, blue, dark wood). See you then!

How long did it take you to completely overhaul a room from start to finish? Did you collect ideas for months and months before beginning?

Wednesday, August 10, 2011

Wordless Wednesday (with Resourceful Mommy & 5 Minutes for Mom)

 First week for me joining in on Resourceful Mommy's Wordless Wednesday & 5 Minutes for Mom!

Marriage Advice From a (Semi) Newlywed

5 Decorating Tips

v     Don’t mess with the man-cave. Whether it’s the garage, somewhere outside, the basement, or a special (ugly) chair in the Living Room- he needs to have some place you can’t destroy (clean/decorate to you = destroy to him).
v     Don’t expect him to be as thrilled as you are over every new project or Apothecary Jar or painting you bring into the house. You’re setting yourself up for disappointment.
v     He does not know the difference between Eggshell, Cream, Antique White, or Cottage White- although it’s obvious to you!
v     Don’t forget he is the man of the house and whether you think he can or cannot make the proper decision (or color choice), he should be allowed the opportunity.
v     Finally, don’t underestimate the power of a little “Mommy and Daddy” time. Is there tension between you and you’re not sure why? It doesn’t need to be as “saucy” as it was (before the Kids came along!), but it still needs to be there.

And that’s what I have learned in the 3 short years Michael and I have been working on our house and family. Do you have any great marriage and relationship tips (or tricks!)?

This post is partying at Things I Can't Say- Pour Your Heart Out

Today’s Favorite Pin: Apothecary Jars for Fall!

Tuesday, August 9, 2011

How To Paint Your Front Door

A Cautionary Tale

Several weeks ago (and I mean several), I decided I wanted to repaint our front door. Ultimately, I want to repaint the entire exterior of our house, but for now, I’ll settle for the front door accent. I am drawn to red or blue doors all the time. I think they’re magnificent. They add the perfect punch of color and to me, just scream Americana. After careful consideration of the colors I want the exterior to be, taking into account the color of the existing roof (blueish gray), and the surrounding neighbors (beige, beige, pink, beige, blah), I decided a deep Navy Blue would suit perfectly. Off to Home Depot I go…
Holy monkey! So many blues! I should have remembered this from when we painted Mickey’s room last year. It was impossible to choose a blue for that project, too!
I tested a few samples on the door.
Then decided on Behr Peaceful Night.
I bought a quart of the paint in Exterior Satin.
Knowing the door would put up a fight switching from Ivory to Blue, I started with a coat of Kilz Latex Primer (always have this on hand- you never know which project might need it). Let me point out, our front door is original to the home (1978) and it’s really the only thing with a little bit of character. It’s fairly ornate, and I knew it wouldn’t exactly be a cinch to paint. I got out a regular paint brush and a small artists brush to do the job.
I painted one coat of primer. Then I decided another coat of primer wouldn’t hurt. I painted a second coat of primer. Let that dry overnight. Came back the next afternoon to start with the actual color. I successfully painted one coat over the flat portions of the door, then started in on each carved section. EACH SECTION TOOK 20 MINUTES! I’m not joking, I timed it so I could estimate how long it would take to finish the door.

8 panels X 20 minutes = almost 3 hours.

After one coat, it looked awful. Had I made a terrible mistake??? I set out to add my second coat the next day… 3 hours later it looked like this:
Seriously? That’s not right. I have so far painted 2 coats of primer and 2 coats of paint. 8 hours of my life on this door and it’s not done. I ended up painting 5 coats of paint, 2 coats of primer (read: 17 hours of work!) and then it looked like this:

I meant to blog about this door a gazillion days ago! You can see why I haven’t been able to. There was no way I was going to show you an unfinished front door! Last night, I added the SIXTH coat of paint and decided that’s enough for me (for right now). I need to move on to another project so here’s what it looks like now:
It’s not bad, but you can see it still needs another coat in a few places. Sorry about the flash “hot spot”, as you can imagine, I’m painting at night (work during the day, take care of child, put child to bed, begin Mommy projects). Thankfully, I LOVE the color. It’s the perfect classic navy blue and it’s the perfect depth of color. Eventually, we will add this color to the accents on our house (columns, window sills, etc). For now, I will sleep peacefully tonight, and set out on my next project tomorrow.

Have you ever had a project that took WAY longer than you expected?

And one last thing: Today’s Favorite Pin!

Monday, August 8, 2011

Today's Favorite Pin

Happiness is a funky colored chandelier.
Have a wonderful Monday!
Don't forget to follow me on Pinterest!

Sunday, August 7, 2011

Today's Favorite Pin ~ Sunday Edition

In honor of the Lord's day, I've chosen a pin featuring a great Bible verse. It really applies to all facets of life, but my Husband and I can especially relate these days.
The KJV of the verse is "He that observeth the wind shall not sow; and he that regardeth the clouds shall not reap"
Don't forget to follow me on Pinterest!

Saturday, August 6, 2011

Today's Favorite Pin

I'm sure you've noticed that Eric Carle's Very Hungry Caterpillar is everywhere. I love how the caterpillar above is done with cheap-easy-to-get paper lanterns. So cute!
Don't forget to follow me on Pinterest!

Friday, August 5, 2011

Today's Favorite Pin

The Beloved Quilt

I’m sure you’ve noticed that quilts are just everywhere right now. I’m not sure if it’s the pending cold weather (hard to imagine right now!), or just a “re-trend” of the tradition of quilting. In any case, you can find a quilt to suit your every need or design want.

My bedding during my early 20’s was this awesome (discontinued-boo!) quilt from Anthropologie. I remember my Dad bought it for me for a birthday, and I was lucky enough to get the quilt and the pillow shams. I have to say that was the most comfortable bedding I have ever slept with. Hands down. I still have it, although it’s a little worn out after years of use. 

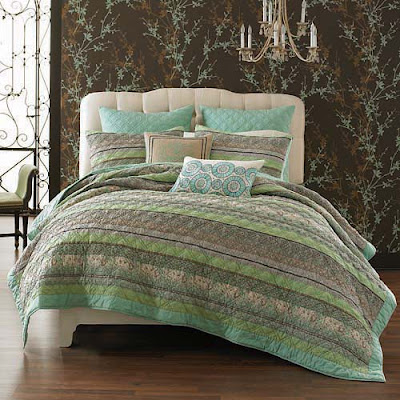
I’m currently on the hunt for an equally comfortable quilt for our bedroom, to add to our current bedding during the winter. My problem is two-fold: 1) I’ve been spoiled by the luxurious comfort of the original quilt and 2) I don’t want to spend more than, say $80- MAX. I also need to stick to our existing color palette of Turquoise and Brown.
Bed Bath & Beyond

In my travels, I have only fallen more in love with all things quilts. They can be used for so many different things. Tapestry quilts can be used as wall hangings.
 Pinterest
They can be used as a fixture on the sofa to add color, pattern, and provide comfy warmth during movie nights.
 Pinterest
They can have traditional block patterns, or awesome modern and funky prints.
 Pinterest
Anthropologie still has a couple of my fav’s.

Anthropologie
Quilts also have a rich history:
Quilting traditions are particularly prominent in the United States, where the necessity of creating warm bedding met the paucity of local fabrics in the early days of the colonies. Imported fabric was very expensive, and local “homespun” fabric was labor intensive to create and tended to wear out sooner than commercial fabric. It was essential for most families to use and preserve textiles efficiently. Saving or salvaging small scraps of fabric was a part of life for all households. Small pieces of fabric were joined together, to make larger pieces, in units called “blocks”. Creativity could be expressed in the block designs, or simple “utility quilts”, with minimal decorative value, could be produced. “Crib quilts” for infants were needed in the cold of winter, but even early examples of beautiful baby quilts indicate the efforts that women made to welcome a new baby.

I am a sucker for a beautiful baby quilt.

My Mom made this one for our son Mickey, and it was a gift at our shower. She made it from fabric scraps that I used in his room décor, as well as (my favorite part) scraps from my husband, Michael’s, old plaid shirts (you can even see the pocket with the Polo logo!).

 
When he was really little, we used the quilt on the floor as a tummy time mat, and took it everywhere with us. It’s been washed dozens of times and only gets softer. Now, it’s being used as cushy-ness on the rocking chair in Mickey’s room. I can’t wait for the day when I can snap a photo of little Mickey carrying his quilt around (Linus-style) while sucking his thumb.

Bottom line- I love quilts. Love the history, love the patterns, love the colors, love the feeling. Do you get that same nostalgic-home feeling when you’re wrapped in a quilt?


Thursday, August 4, 2011

Today's Favorite Pin

Today's favorite Pin! I l.o.v.e. fresh colors in the living room. Such an easy design concept to follow: floral, solid, polka dots or geometric pattern all in the same color family = instant Living Room!